
Oh
good god why didn't I come to university sooner?
I
mean.... wow... Just... wow... about one day after getting here and
I was on cloud nine and haven't come down much since. And then
there's the making. So much making
on this course in so many ways that I probably won't put too
much on here because most people haven't got access to three types of kiln,
full sets of glass working machines, workshops and the strange new
notion (strange to a health and safety sixth form restricted
student) that I can go into these places whenever
the hell I need to
and make.
And
I haven't even talked about freshers yet. The booze, the parties, the
immediate friends and fellow 18-25 year old strangers getting to the
second floor block party via climbing up the side of the building and
collapsing through the kitchen window.
So, annoying bragging aside, I've been a little busy lately meaning I haven't got back onto this
blog for a couple of months, whilst also eating second helpings of
humble pie by seeing I have got a
hell of
a long way to go before I can even conceive myself as being a damn
fine maker.
There's
been ceramic projects...

And needed lie-ins.... Lots and lots of needed lie-ins.
...glass
projects...

The blood shed for this project by all of us was ridiculous
.... Yes I mean that literally.
...cheaper
handmade Christmas gifts...

*shameless advertising of talents
...and
my first craft stall where I manage to sale my most popular handmade
items at the grand total of one pair of earrings. So here's how I
made them (based on a method with brass shim that a good friend taught to me).
For this one I used:
- Earring hooks
- Black thread
- Brass Shim
- Something to indent with (blunt pencil/pen can work)
- Beads
- Hammer and nail
- Needle (optional)
- Sand paper
So first I indent a very simple tear pattern onto my brass shim and cut out with scissors, giving it a slight curve to the points (it gets sharp otherwise). It's also a good idea to sand down the sides a little to make sure there are no razor sharp edges.

Next I indented around the edge of the leaf, almost like shading a line in (it helps if you have 'soft' surface underneath such as a sketch pad or wad of paper to get the best indentation).

Turning it over, I then indented the other side with a leaf vein patten.
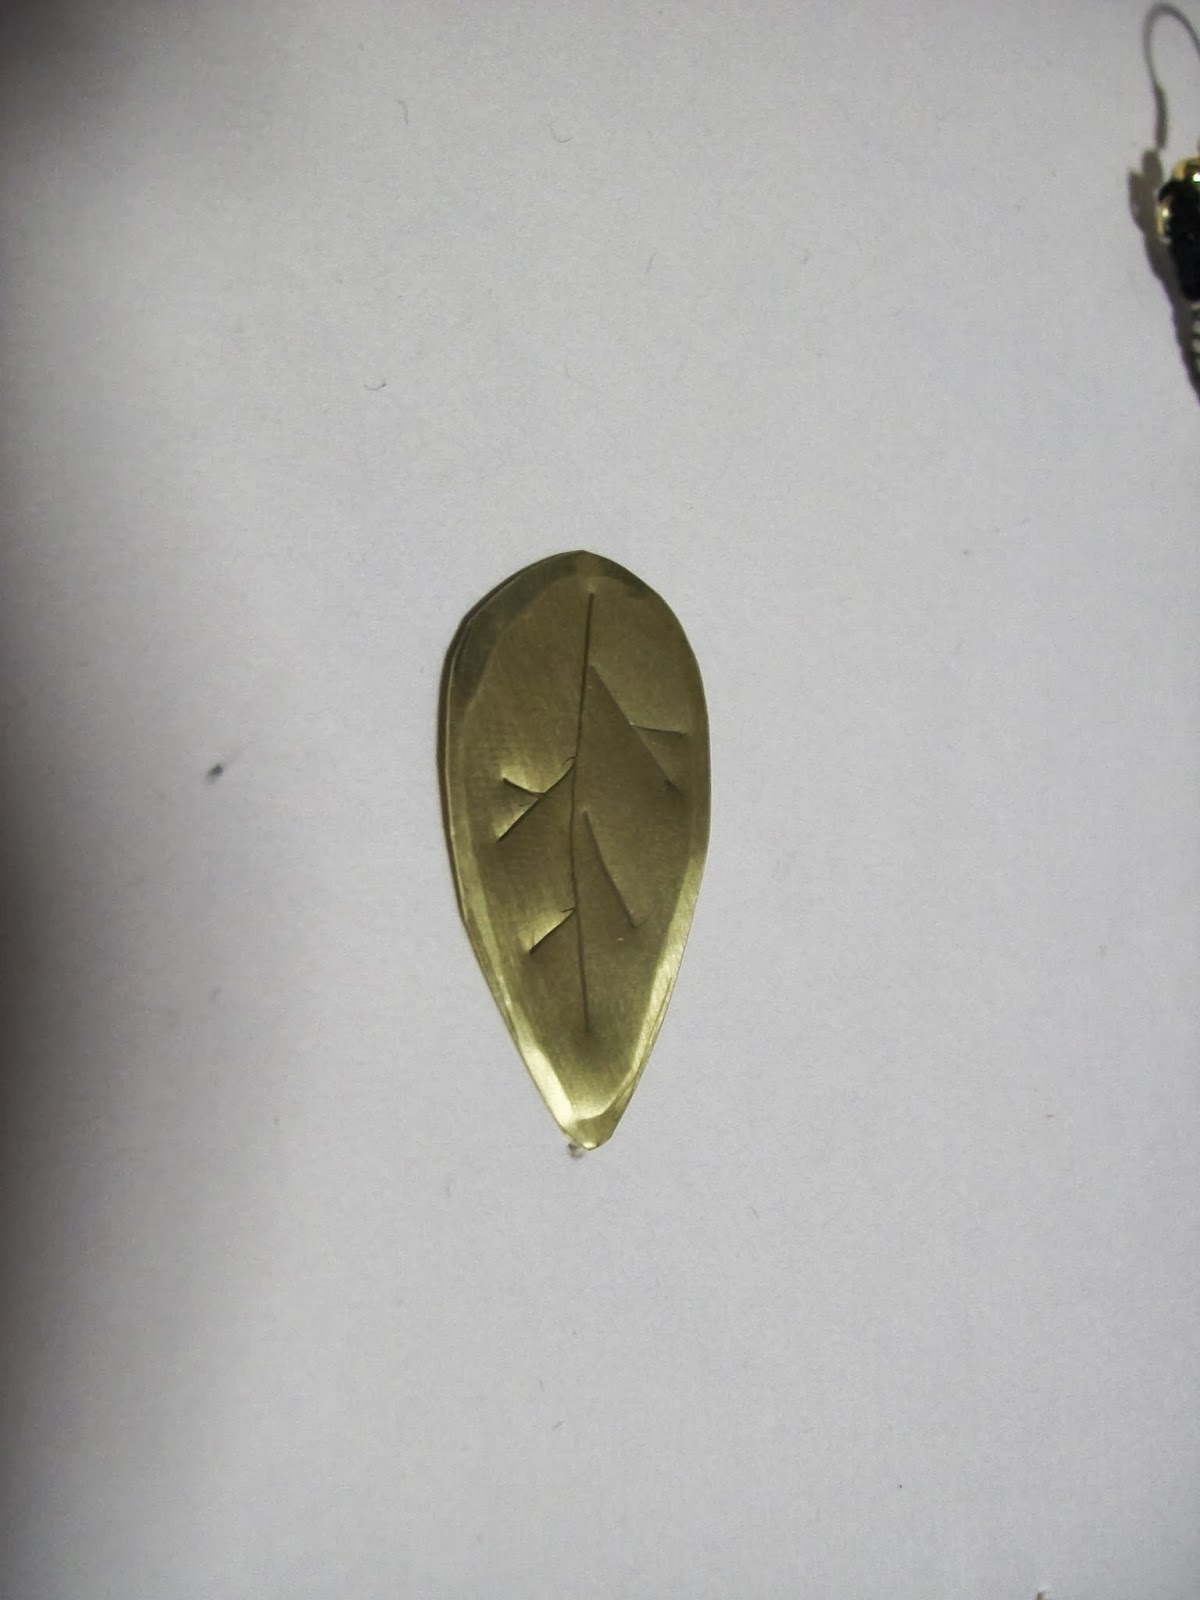
Turning it over yet again, I then 'shade in' the rest of the area around the veins to make them stand out:

Getting a hammer and nail I hammer a small hole through the top for the thread to pass through and then made a second smaller leaf. For the earring itself I took an earring hook and thread two long pieces of black thread through and tied it to have four strands dangling from it.

I then started to weave it like a friendship bracelet. To do this you need to split your four friends up like so:

You then take the first thread on the left and knot it around each thread until it becomes the one on the far right. Then take the second thread which is now the first on the left and do the same thing and etc. Here's a simple diagram:

After a few millimeters I threaded on my first bead and tied a knot beneath to keep it in place:

I then took the two strings on the left and made a two stringed friendship bracelet knot for a centimeter or so until I knotted and added a second bead and knotted again beneath. Then I tied on my first brass leaf:

I then did the same with the other two threads and then the entire process again for the second earring:

No comments:
Post a Comment